

So here is what the kitchen looked like when I last updated you.
Since then, my dad added the crown moulding. I chose something called "cove" at Home Depot. I had to be careful not to get something that stick out too far or it would be weird in the areas where it met the staggered cabinets. I then caulked and painted the moulding. I also touched up the painting of the cabinets. I still have to get the last coat of Polycrylic on them.


We also staggered the cabinet above the fridge but I didn't take a pic of that for you. We are debating about replacing our fridge now or waiting until next year when we can just replace all the remaining appliances together. I think we are leaning towards that unless our fridge stops working before then (pleasepleaseplease).
Now onto the easy but much needed pantry project that I did the last day and a half. It has pained me every.single.day to look at the darn pantry. You would think it would be great to have a pantry. And it is but it was not functioning quite right. At all.

The shelves were too deep and everything would get lost. I had no idea we had an unopened peanut butter or three bottles of EVOO. Basically it was a hot mess and it was driving me crazy. So I emptied it out.

Removed the shelves.

Removed the upside down trim that was holding the shelves in place. Then I had to paint it white to cover up the peachy-flesh color (that had covered every inch of wall space of that level of the house when we moved in).

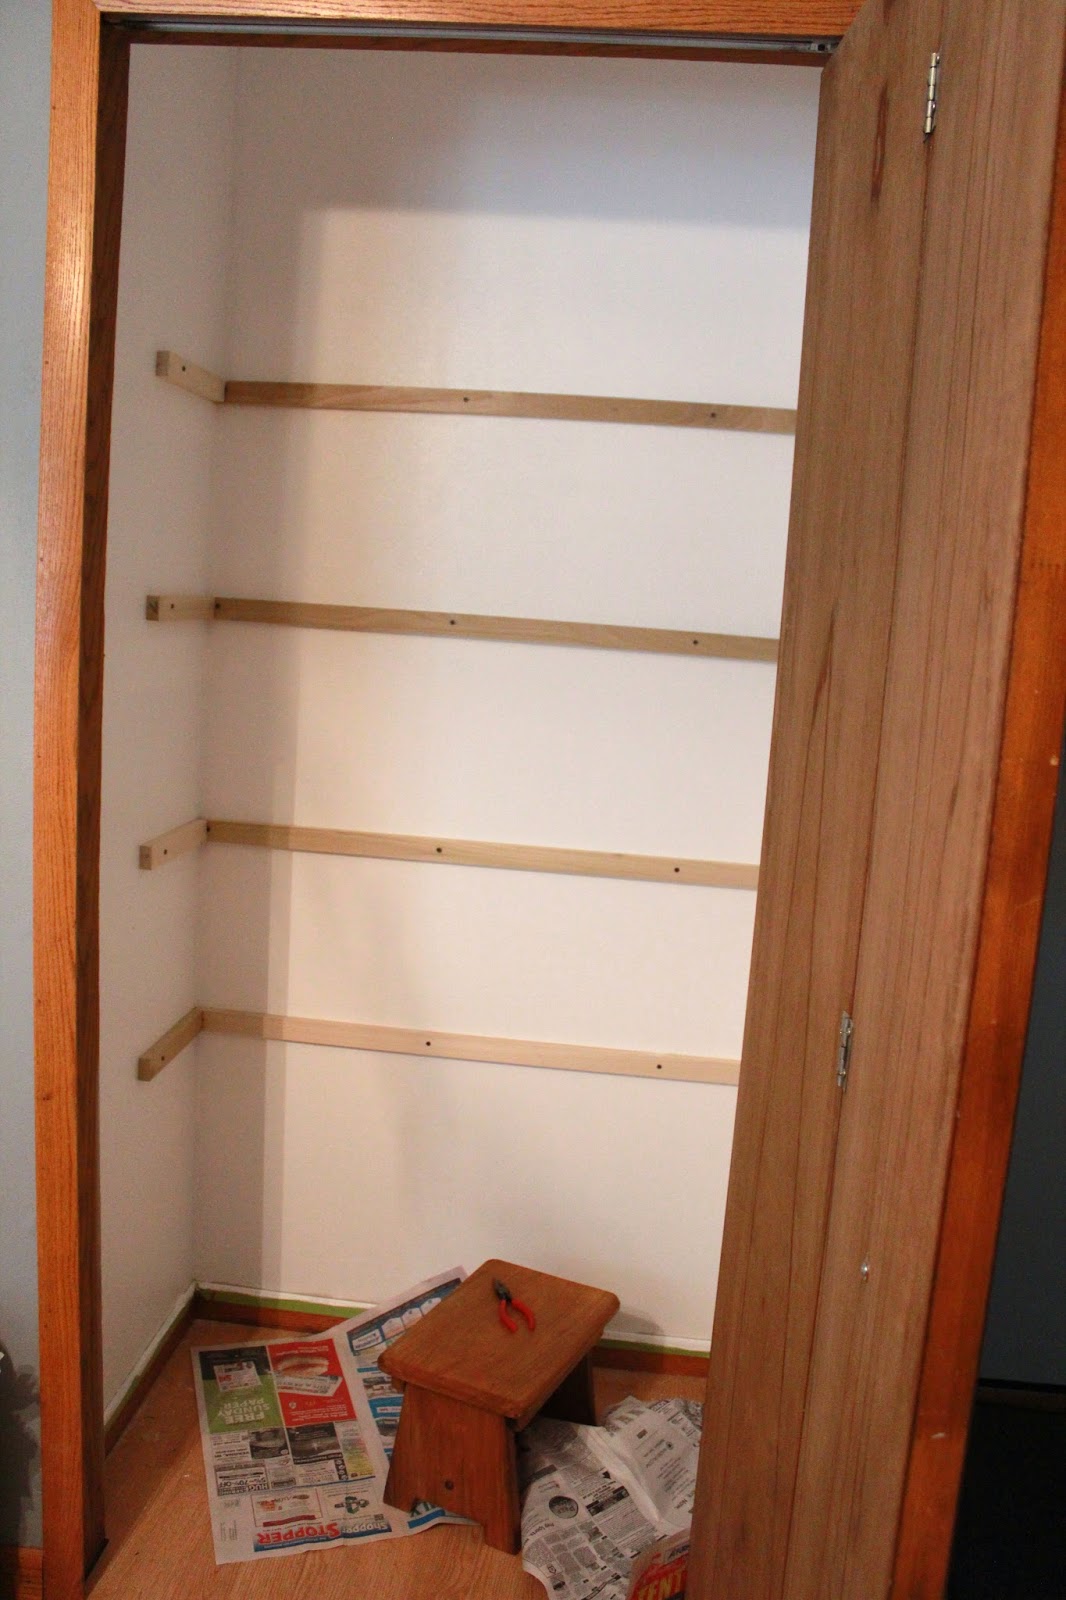
Next, I measured and traced a level line for my shelves.

I found the studs and drew a line down to intersect my horizontal shelf lines. (See all my holes where i was looking for a stud? No worries, it was covered by a 1 X 2). Also, when I proudly informed the hubs I found the 3 studs that run against the back wall of the pantry, "Hey, I found 3 studs!" Hubs, "Nope, you found 4." Weirdo....

Got the back 1 X 2s on.

And then the right side.

And then the left.
I wasn't sure if it was ok to cut the particle board down into L shapes for new shelves. So I called my dad and he said yes but they may not be strong enough. I decided to give it a try. So measured out 10 1/2 inches for my L shelf. I cut the shelf with our jigsaw.

I put it in to see if I liked it.

Duh! forgot to account for the 1 X 2 in the back.

So I measured the long part of the L for a shelf depth of 11 1/2 inches. Much better.


Ta da! The finished product!!


I feel like spending some quality time in there now! I love it!
Up next, my dad is coming this weekend. I plan to have him install some wood doors on the front that open from the center and swing out. Then I will install some shelving/baskets to the inside of them to store spices, baggies, tinfoil, etc. Can't wait!
No comments:
Post a Comment