Showing posts with label kitchen. Show all posts

Sunday, June 29, 2014

Pantry Reveal

My parents came this weekend and brought my sweetheart son back after having him all week.  I missed this boy soooooooooooooooooooooooooooooooo much!


Makes me already start mourning the day he moves out.  I am not kidding.  I may or may not have cried everyday he was gone.  I will never tell.

So he is home and my parents stayed to help me out with the pantry project.  If you recall from this post, this is what the pantry used to look like...


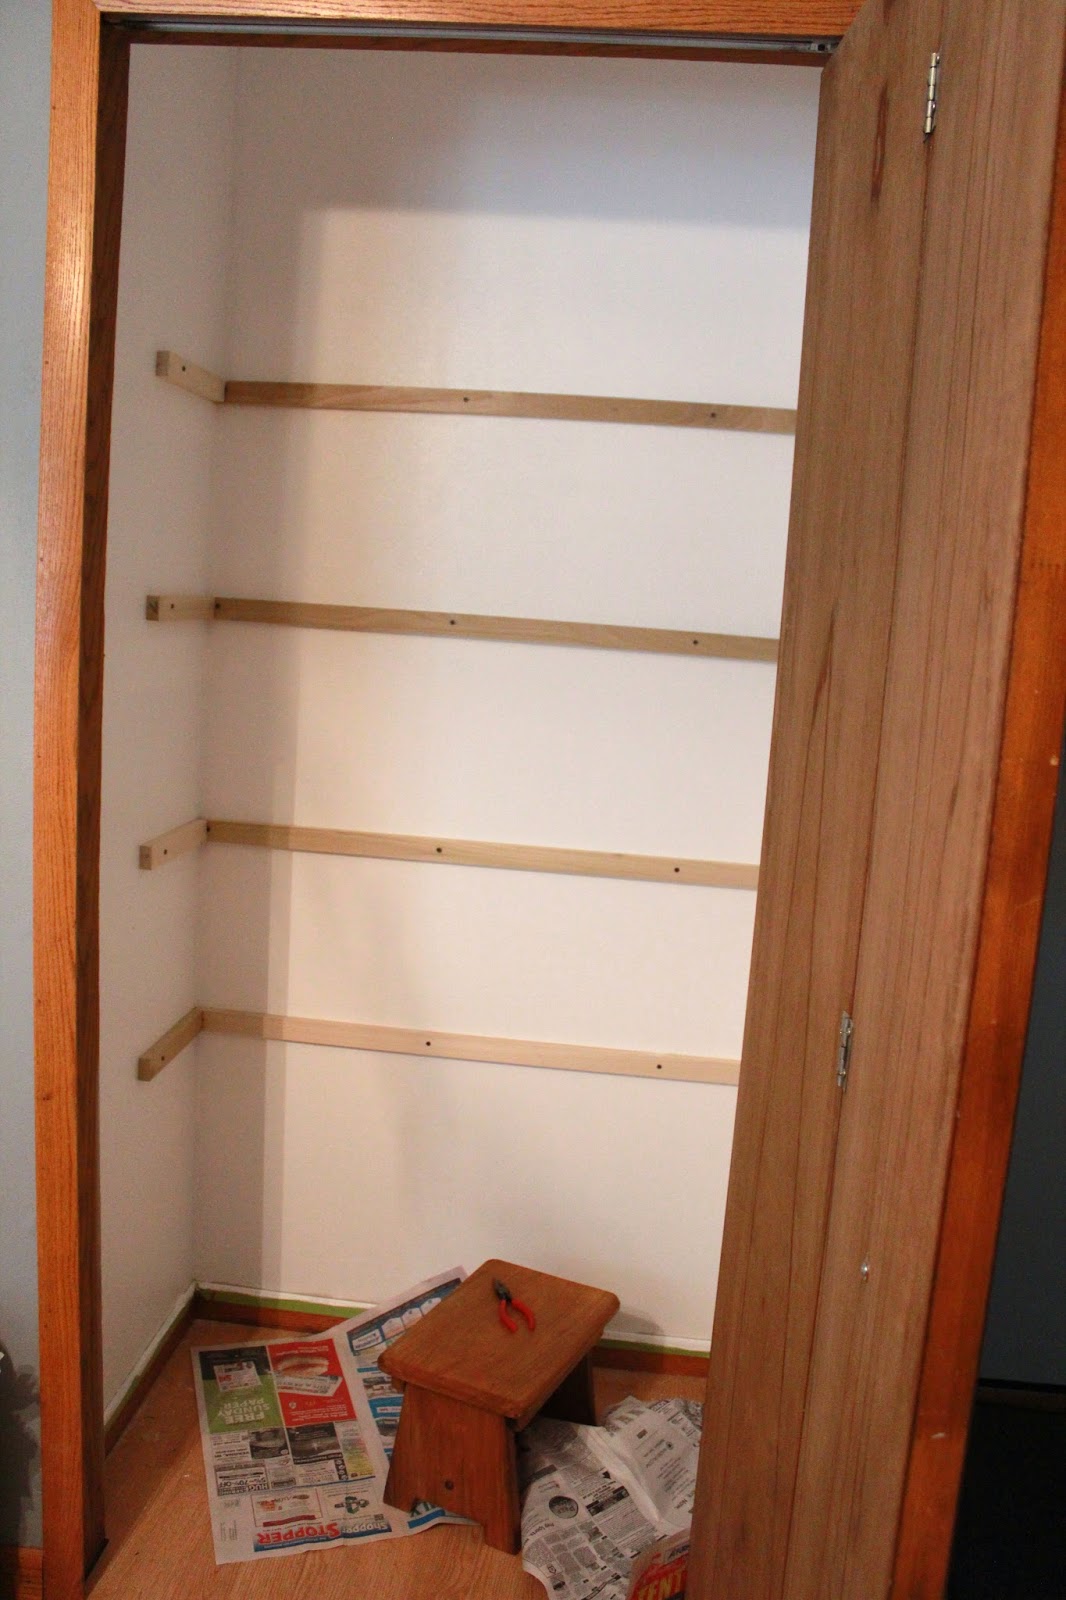
Gross.  Anyway, I got it to this point last week...


I cut down the shelving into Ls and put them up properly with the correct bracing.  But I needed my parents' help for the rest.

But first, some Sydney time...

Ok, first the trim comes down.


Testing out the doors before putting the hinges on...

 The doors are actually one solid clear pine bifold 36" X 81" closet door.  My dad removed the hinge from the center so we could use it as two doors that open in the center.  I got them at Menards and one bifold door was $105.

 The magnetic catch that will keep the doors closed.


This is what it looked like to have the doors and hardware on.  I used the old drawer pulls I had since I replaced the drawer pulls when I painted the cabinets.


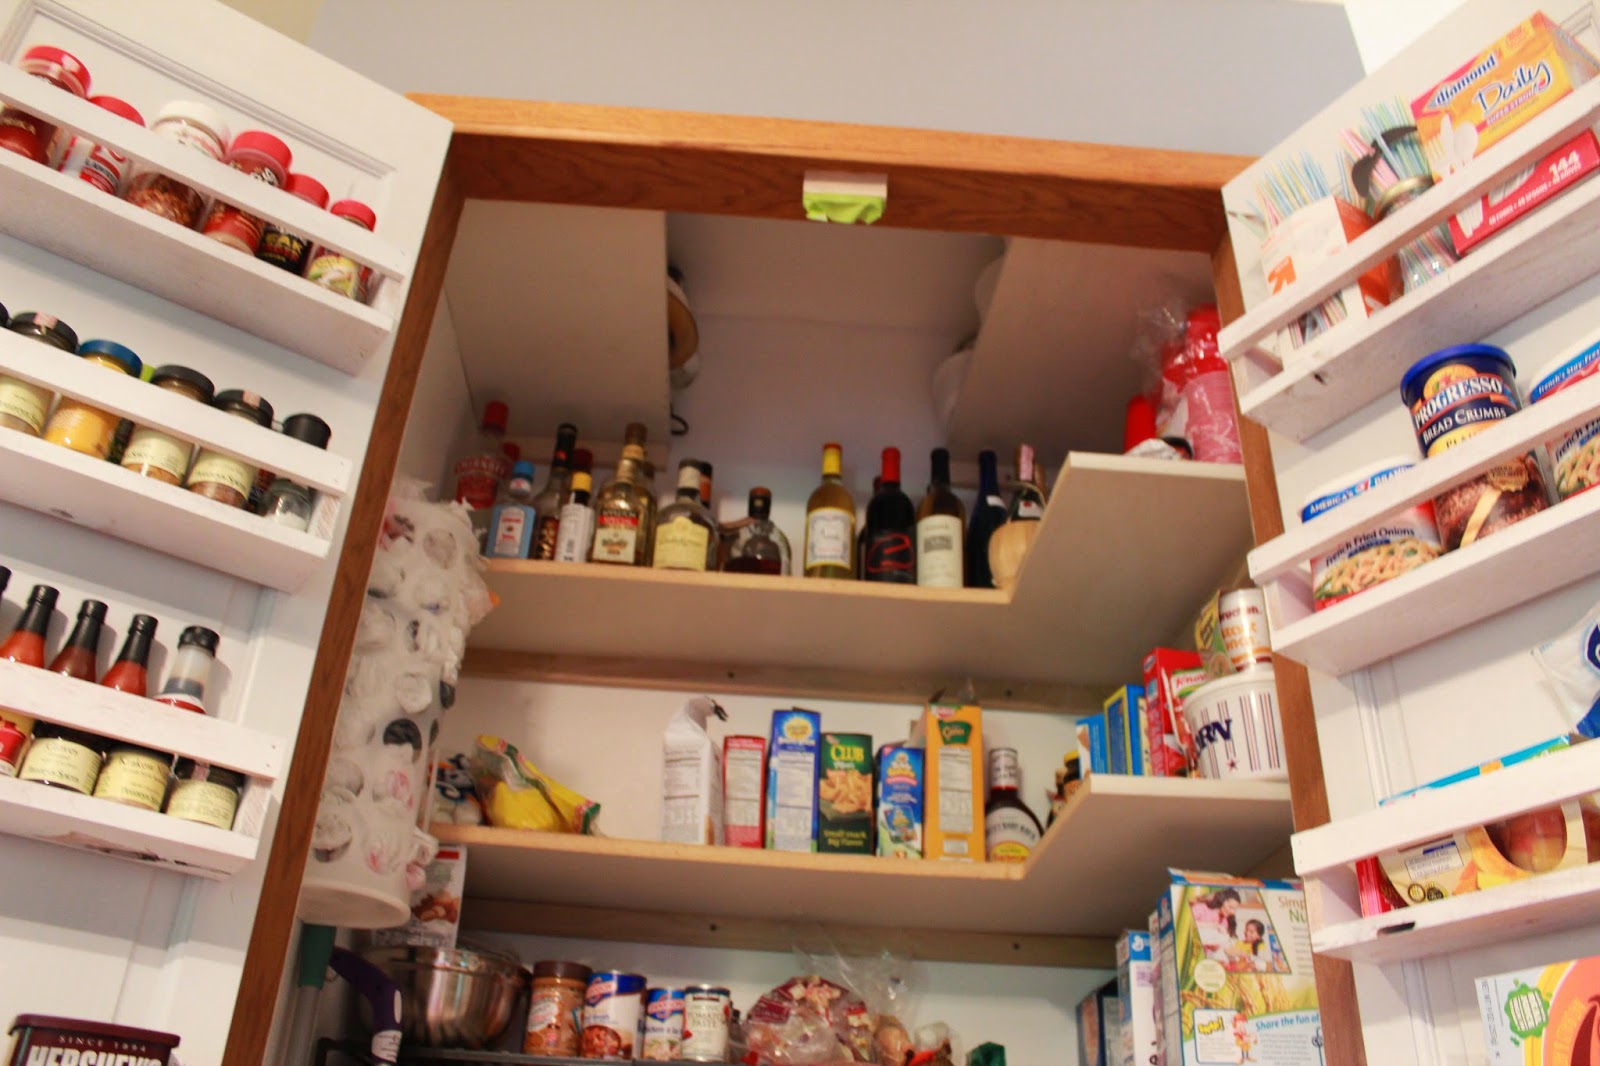
My dad made up some cute shelves for the inside of the doors for spices, cutting boards, baggies and stuff.  I am not going to say how many prototypes it took.  We eventually found a prototype we (mom, dad and I) all could agree on and my dad somehow still talks to us.


Then I removed the shelving and spray painted them in the garage.  I left the doors in place and just taped off the trim.  I primed them and then painted two coats of the same paint I used on the kitchen cabinets: Dutch Boy- Thin Ice.


 I cleared off the fridge because guess what???  We are getting a big, shiny new one delivered on July 12th!!!  Woot woot!

Now look waaaaaay up to the top.  I added two more shelves for rarely used items.  And pay no attention to the painters tape on the magnetic catch.  I will be painting it black the next time I have my chalkboard paint out.


And while we were at it, we replaced the hollow core lame entry closet door with a new
wood one for consistency.  And I have some organizing plans for that closet this fall.


I am super excited this project is complete.  Love me some organization.  Now just counting down the days for my fridge!

Linked up to


<div align="center"><a her="http://www.thriftydecorchick.blogspot.com/" title="TDC Before and After" target="_blank"><img src="http://www.homestoriesatoz.com/wp-content/uploads/2012/03/beforeAndAfterButton_thumb1.gif" alt="TDC Before and After" style="border:none;" /></a></div>

Monday, June 23, 2014

Kitchen update and pantry project


So here is what the kitchen looked like when I last updated you.

Since then, my dad added the crown moulding.  I chose something called "cove" at Home Depot.  I had to be careful not to get something that stick out too far or it would be weird in the areas where it met the staggered cabinets.  I then caulked and painted the moulding.  I also touched up the painting of the cabinets.  I still have to get the last coat of Polycrylic on them.


We also staggered the cabinet above the fridge but I didn't take a pic of that for you.  We are debating about replacing our fridge now or waiting until next year when we can just replace all the remaining appliances together.  I think we are leaning towards that unless our fridge stops working before then (pleasepleaseplease).

Now onto the easy but much needed pantry project that I did the last day and a half.  It has pained me every.single.day to look at the darn pantry.  You would think it would be great to have a pantry.  And it is but it was not functioning quite right.  At all.


The shelves were too deep and everything would get lost.  I had no idea we had an unopened peanut butter or three bottles of EVOO.  Basically it was a hot mess and it was driving me crazy.  So I emptied it out.


Removed the shelves.


Removed the upside down trim that was holding the shelves in place.  Then I had to paint it white to cover up the peachy-flesh color (that had covered every inch of wall space of that level of the house when we moved in).

Next, I measured and traced a level line for my shelves.


I found the studs and drew a line down to intersect my horizontal shelf lines.  (See all my holes where i was looking for a stud?  No worries, it was covered by a 1 X 2).  Also, when I proudly informed the hubs I found the 3 studs that run against the back wall of the pantry, "Hey, I found 3 studs!"  Hubs, "Nope, you found 4."  Weirdo....


Got the back 1 X 2s on.


And then the right side.


And then the left.


I wasn't sure if it was ok to cut the particle board down into L shapes for new shelves.  So I called my dad and he said yes but they may not be strong enough.  I decided to give it a try.  So measured out 10 1/2 inches for my L shelf.  I cut the shelf with our jigsaw.


I put it in to see if I liked it.


Duh!  forgot to account for the 1 X 2 in the back.


So I measured the long part of the L for a shelf depth of 11 1/2 inches.  Much better.


The Foreman- made sure I took lots of play and feeding breaks;)

Ta da!  The finished product!!


Plastic bag holder from iKea.


I feel like spending some quality time in there now!  I love it!

Up next, my dad is coming this weekend.  I plan to have him install some wood doors on the front that open from the center and swing out.  Then I will install some shelving/baskets to the inside of them to store spices, baggies, tinfoil, etc.  Can't wait!


Saturday, May 17, 2014

Kitchen update update

 I am a moron.  I mean, who the heck does not take appropriate before pics when they plan on doing a BEFORE and after blog post???  This lady, apparently.

Sigh.

I just got the urge to go for it one day (Easter sunday) and could not possibly stop to take some pics before I started ripping off the doors.  Anyway, I do have a pic of the cabinets when I photographed the new microwave install.


It gives you a good idea of what they looked like and just how dark they were.

These are the only pics I have of the other part of the kitchen.  Obviously taken after the cabinet doors were removed.


All of the contents were then unloaded and piled up on the dining room table.  Then the real work began.  Sanding of the doors and frames.  Wipe them down.  Prime them, let dry.  Ship two of the doors off with my dad so he would cut out the inside panel and get some cool glass installed.  Apply first coat of paint, let dry.  Apply second coat of paint, let dry.  Apply satin Polycrylic, let dry.  Attach hardware (I got new hinges which needed new holes drilled in the doors and new drawer pulls but used the same door pulls).

I was a huge process that took about 3 weeks.  I used the technique and steps laid out on this blog to avoid those pesky brush strokes.

I used a Kilz primer and a Dutch Boy paint in "Thin Ice" which is a very pale grey.

 Poor Turbo, has no idea where she is...


 Yes, the white appliances look ridic with the new color of the cabinets but they will be all replaced soon enough.

 Close up of the Nicaragua, I mean Niagara, glass panes.


Sorry about the picture quality on some of these.  I had to use my standard lens and I am not very good at it.  I think the the cabinets turned out great and it is much more open and bright!  I love it...but this has only led me conclude that we need to replace our counter tops and install a backsplash like now.  I already know that I want a white subway tile backsplash and I am heavily leaning toward a dark soapstone counter top.  And then I may decide to paint the walls too, you know because I have so much time on my hands and all.

Up next, moulding to the tops of the cabinets!